|
| "Haven't we seen you somewhere before recently?" |
I'm running behind with my battle reports what with real life interrupting, as it is wont to do!
The Iberian campaign had its second round of battles at the last Saturday club meeting a fortnight ago. My forces had retreated on Burgos where they joined up with the detachment they'd sent off at the start of the campaign. Instead of doing the sensible thing and digging in, or waiting behind the city walls for reinforcement, I marched out to meet the Prussians who'd been hot on my heels during the retreat. They'd successfully masked my reconnaissance attempts, so I had no idea of exact numbers, but it looked like the same force I'd encountered in our first game was bearing down. I was hopeful that the boost to my numbers was enough to stop Andrew's pursuit and possibly force him to retreat, but maths not being my strong suit, this hope was more of a pipe dream, as he still comfortably outnumbered me.
Tim volunteered to play a subordinate command role, initially confused when I started unpacking my French troops, because he was labouring under the mistaken belief that I was playing British. As his son was opposing us with his Prussians, it would have signified a drastic break in the Allied camp! Tim's early onset Alzheimer's episode was laughed over and quickly cleared up for him to take the advance guard and the 1st Division.
Again, the Prussians won the initiative and advance on the town stretched along the road next to the stream. Passing around the town on our right, Andrew attempted to head off the main body, which he knew was approaching up the road. Tim, meanwhile boldly advanced on the Prussians on the left flank of the town, charging the guns with the lancers, and forcing the supporting infantry into square. The gunners abandoned their guns for the safety of the town, while Tim's infantry, hussars and horse battery fanned out to the left in an attempt to contain the Prussian advance on that side, as per instructions.
 |
| Tim commands the avant garde (maybe they like atonal jazz and cubism?) |
 |
| The Prussians race ahead |
 |
| "Time for beer and sausages after we whip the French, boys!" |
 |
| "Time for wine and escargots after we whip the Prussians, boys!" |
 |
| Sneaky Prussians try flanking move around the town. |
 |
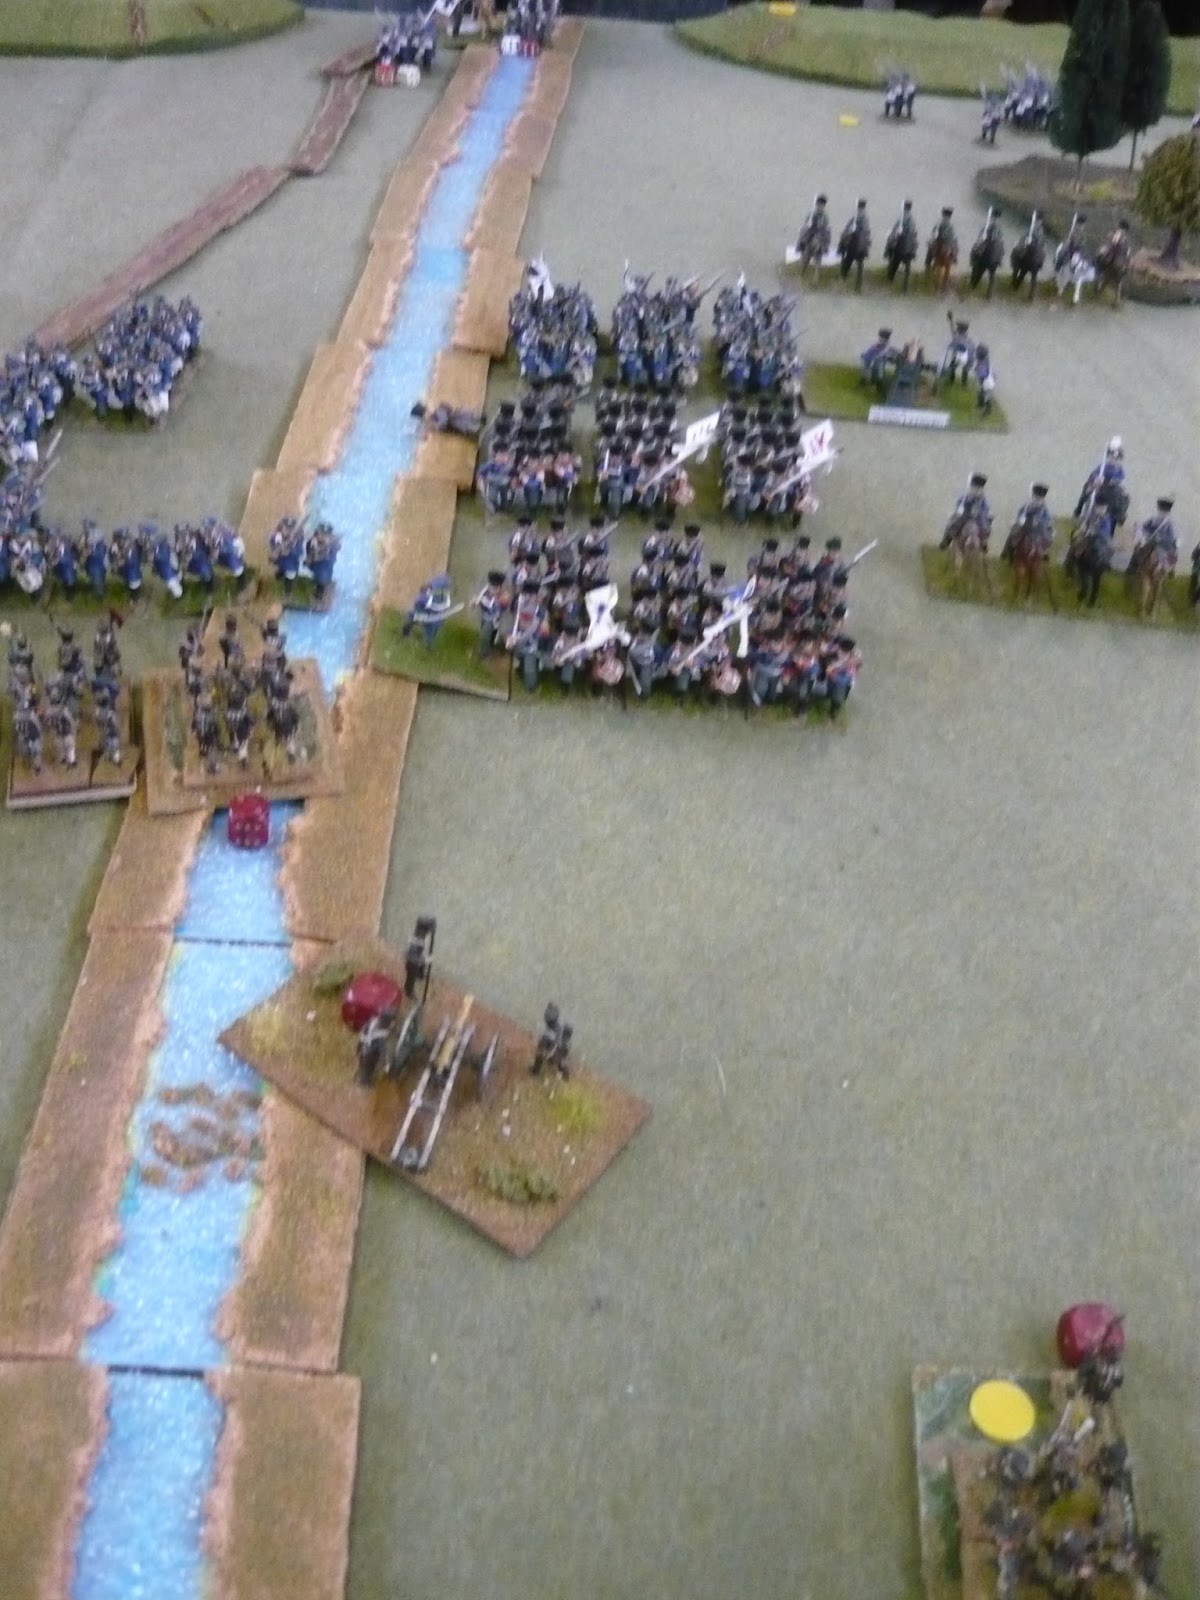
| Same view from above. |
I rolled well and managed to get the French main body onto the table in the next turn. Fortunate for us, because Andrew was positioning his Landwehr lancers to intercept the French main body as it came on the board. Any delay in getting them on the board could well have proved problematic for the French! As it was, I had a strong dragoon regiment on that flank which was more than able to neutralize the Prussian cavalry threat.
Andrew also rolled well, his main body advancing to take on the French advance guard's defensive line. He occupied the BUAs nearest his side of the town with his Landwehr battalions, planning to anchor himself on that side of the town. His infantry squares fired on the lancers, forcing them to retreat with losses, momentarily threatening the right flank of the French advance guard. However, the remainder of Tim's command had advanced close enough to the town for him to launch a brigade charge on the town. The first two BUAs were empty, so the French infantry rushed on, picking up disorders, but their momentum was unstoppable! They cleared out the middle 4 BUAs, leaving the Prussians in possession of only the last two. My infantry followed up Tim's success by attacking the supporting battalion between the town and the river. With all the units fleeing from the town, this one stood no chance!
 |
| Tim weighs his options on the left flank of the town, while Andrew moves his troops into the BUAs. |
 |
| Tim's lancers charge the guns! The supporting Prussian infantry form squares, while the gunners prepare to abandon the guns to flee to cover. |
 |
| Tim's infantry move out to the flank between the successful lancers and the hussars. |
 |
| "Hmmm...what do we do now?" |
 |
| Never fear! The main body is here! |
 |
| Closest to the camera is my command, while the figures on the other side of the road are the rest of Tim's 1st Division. |
 |
| Those pesky Landwehr lancers! Too far away to affect the French deployment, but still need to be watched carefully. |
 |
| The situation so far; French advanced on the left, while the Prussians are also pushing forward on their left. |
 |
| The 2nd Division pushes ahead with the dragoons protecting their right flank. Time to leave, lancers! |
 |
| After copping flank fire from the town, Tim's lancers retreat, blown and with disorders, but no extra casulaties. |
 |
| The infantry, hussars and horse gun battery still stand firm. |
 |
| Though now Andrew's main body, including lots of cavalry, make an appearance beginning to tip the scales in the Prussians' favour. |
 |
| "Vorwärts, meine Kinder!" |
 |
| "Avant, mes enfants!" |
 |
Landwehr infantry enter the town to occupy the nearest BUA, covered by a column of regular infantry.
Note the artillery crew perched on the rooftops! |
 |
| The French dragoons head up the river across from the infantry, providing flank cover. |
 |
| Because, sure enough, here come the heavy hitters: Prussian hussars! |
 |
| 2nd Div pause while the guns unlimber to fire on the Prussians |
 |
| Meanwhile, on the right flank, the Prussians and French infantry go toe-toe in a charge and counter-charge! |
 |
| With the honours even, both sides withdraw with disorders. |
 |
| Tim launches a brigade charge into the town! |
 |
| Tim's infantry occupy the middle of the town, so it's my turn to offer some support! 2 French battalions charge at the supporting single Prussian column. |
 |
| Their success brought them into a perfect position for the Prussians in the last BUA to give a little flank shot into my victorious columns. With their tails up, my troops just shrugged it off contemptuously. "Bloody Landwehr! Who do they think the are?" |
 |
| The Prussians regulars break, heading for the hills! |
However, this was probably our high-water mark, as more and more Prussian forces entered the board. Tim had cavalry and infantry threatening to spill around his left flank around and even through the quarry which anchored his left. On my right flank, the Prussian cavalry advanced to meet my dragoons in an evenly matched inconclusive clash, while a massive column of Prussian infantry followed behind. In an attempt to disperse the Prussian cavalry, a couple of my infantry battalions advanced out of support range to fire in the flank of the Prussian dragoons. While it succeeded in forcing the cavalry to retire, the Prussian infantry now had an easy target!
 |
| The rest of 2nd Div. fan out to the right in closed column, crossing the shallow river to challenge the Prussian cavalry. |
 |
| The dragoons also shake out into line in support. |
 |
| The crowded town! |
 |
| As Andrew re-manned his guns, Tim's troops charged them again! |
 |
| On my flank, the cavalry and infantry advance. an inconclusive firefight ensued, but with my flank open, it's time to bring up support! |
 |
| One closed column moves up and is promptly charged by Prussian cavalry. |
 |
| An inconclusive stoush forces us both to return to our starting points. |
 |
| I was trying to get my infantry into a position to threaten the flank of these Prussians, but they decided the best way to get out of the way was forward; Charge! |
 |
| Another inconclusive combat left the cavalry back where they started with an extra disorder. |
 |
| There might still be an opportunity to out-flank the Prussian cavalry! |
 |
| Time to pull back the infantry with the exposed flank and straighten up the line. |
 |
| Andrew's view of the flank Tim was holding. The pressure builds! Cavalry go for a wide flank march, while infantry masses near the town. |
 |
| Andrew's blown hussars wait for an opportunity. |
 |
| What's that on the dragoons' flank? Those pesky lancers are getting up to no good again! |
 |
| The two columns on the right flank try something a little too ambitious and get clobbered for their impertinence! |
 |
| Run away! |
Tim battled manfully on the left flank, but with a whole brigade still locked up in the town, it was really not surprising that Andrew's weight of numbers told in the end (again!). Another inconclusive cavalry clash on my flank presaged an infantry steam roller advance, while Tim managed to get a whole brigade running away before he, too, had to withdraw before being overwhelmed.
 |
Tim's light infantry are threatened by cavalry, but also face guns and infantry.
The Prussians charge the squares! |
 |
| Tim counter-charges with a whole brigade! |
 |
| In a titanic conflict, the opposing forces come off in a draw! |
 |
Back on my flank:
Here come those lancers! |
 |
| As well as a s***-load of infantry! |
 |
| My chasseurs head off the lancers... |
 |
| ...who opportunity charge the chasseurs! Lucky they were only landwehr or I'd have been in big trouble! Even stationary chasseurs can chase off landwehr lancers! |
 |
| All the troops are on the table. My flank is looking particularly unstable! |
 |
| The Prussian horde! |
 |
| Another clash of cavalry! |
 |
| I roll a 6! |
 |
| But so does Andrew! Back to our starting positions again... |
 |
| Back on Tim's flank, reserves approach.... |
 |
| ...as Andrew begins to retake the town! |
 |
| The hammer blow falls! Andrew charges my guns. The crew fires and misses, then stands to protect the guns! |
 |
| They manage to save half the battery in their retreat! |
 |
| The victorious Prussians end up in the flank of my infantry! |
 |
| Tim goes on thecounter-attack. |
 |
| Run away! |
 |
| My reserves come up in an attempt to extract the columns in danger |
 |
| Firefight! |
 |
| Back on Tim's flank, the Prussians charge Tim's anchored line. |
 |
| Tim's massed musketry, plus a botched pre-melee check ensure the attack fails |
 |
| Run away! |
 |
| Time for the guns to be run up to do the job properly! |
 |
| Out on the extreme left flank lancers do battle. |
Burgos looks like a good place to hunker down and fortify a defensive position which hopefully will counter the Prussian weight in numbers. Either that, or retire to another sector of the peninsula where I can get support from one of my fellow French commanders. We'll see...