|
"Для Матери-России и царя!"
Darren's Elite Miniatures Russian infantry, displaying his lovely painting and basing skills. |
Our Napoleonics group took a breather this year from having an early January mega-game (Tim and Jill needed a bit of time off for good behaviour!), but our 2017 game is well under way with preparations furiously being made; figures painted, commands assigned, special rules designed and so on. The battle in question will be Napoleon's masterpiece, Austerlitz.
As a little taster of what to expect, Darren organised a game based on the Battle of Dürenstein in 1805. It was an engagement after the surrender at Ulm, but before the capture of Vienna. Marshal Mortier's brigade was strung out along the Danube, dangerously spread out and vulnerable to attack from the hills to the north. Kutuzov decided to attack and sent his forces down through steep defiles to cut the French advance and push them into the Danube.
I had control of Bagration's and Dokhturov's 1st and 3rd Columns, respectively, and had the task of stopping the French from advancing any further down the Danube valley and cutting the head off the French advance.
The French started under the pump, having to send off back down the line for reinforcements. Allied advances were staggered, with Darren's entry with the 2nd Column determined by die roll, just to make things a little interesting.
To give the Allies a bit of a head-start, Quinny's Austrian forces were an ahistorical command as he was asked to bring along 1500 points, including 2 regiments of cuirrassiers. In the historical battle there was only one brigade of Austrian Grenzer infantry, which was uncommitted, as well as the cuirassiers. Quinny's infantry command included grenadiers, line and landwehr infantry.
The Bayly boys and Glenn, returning after a long illness, took on the French role.
My 1st Column was up against Graindorge's 1st Brigade of Gazan's 2nd Division, ie. the tough-nuts of the 4e Legere commanded by the wily Andrew B. I thought that I would be bottled up in the very tight terrain between the hills and the Danube in front of Rothenhof. Luckily, I had a combined arms force, whereas Andrew was limited to infantry only. His dragoons were a fair way behind, but approaching. I wanted to break through Andrew's line before his cavalry came up in support. The problem was he was deployed in a long line across the mouth of the valley, able to deploy all his firepower, while my infantry wasn't. His training was superior to mine; but even though I had the best Russian infantry on the battlefield, they weren't as good as the French and didn't have the space to deploy. I opened a space to allow the artillery though and placed a small detachment of dragoons behind the guns. As the weather was atrocious, movement was reduced by a 1/4, but even so, I moved slowly as I didn't want to expose myself to a devastating firefight just yet. I thought I'd leave it to the guns to whittle down the line as well as sending a battalion of jaegers to skirmish against the formed troops. What a waste of time that was! Jaegers are classed as semi-skirmishers in our rules; troops who can, but are by no means skilled at, skirmishing. Andrew countered with a skirmish line of his own, which added to the futility of what I was trying to achieve. In the end the jaegers took too many casualties, broke and ran when I persisted in attempting to skirmish against the line. Pathetic!
 |
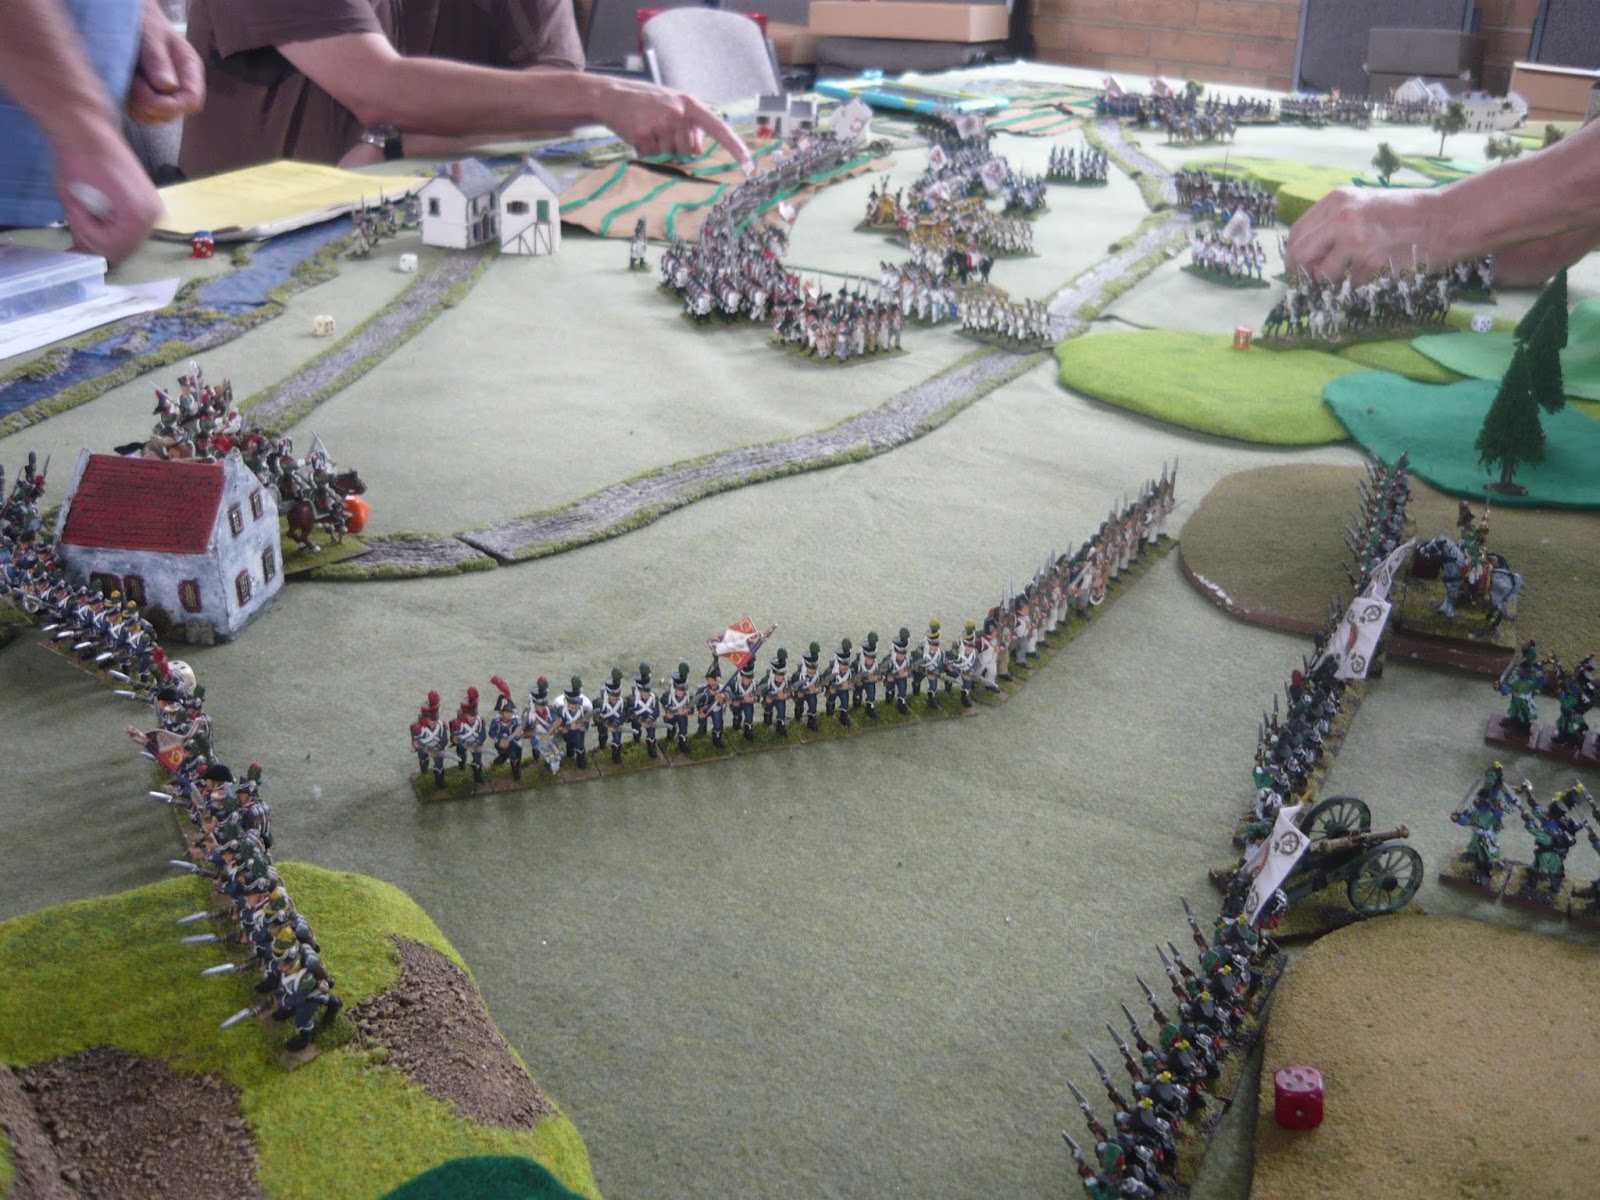
| The table: Rothenburg closest to camera, where 1st Column approaches. |
 |
| 1st Column approaches in 'masses', interpreted as closed column in our rules. |
 |
| The 4e Legere await! |
 |
| Quinny's Austrian cuirassiers appear down the central defile. |
 |
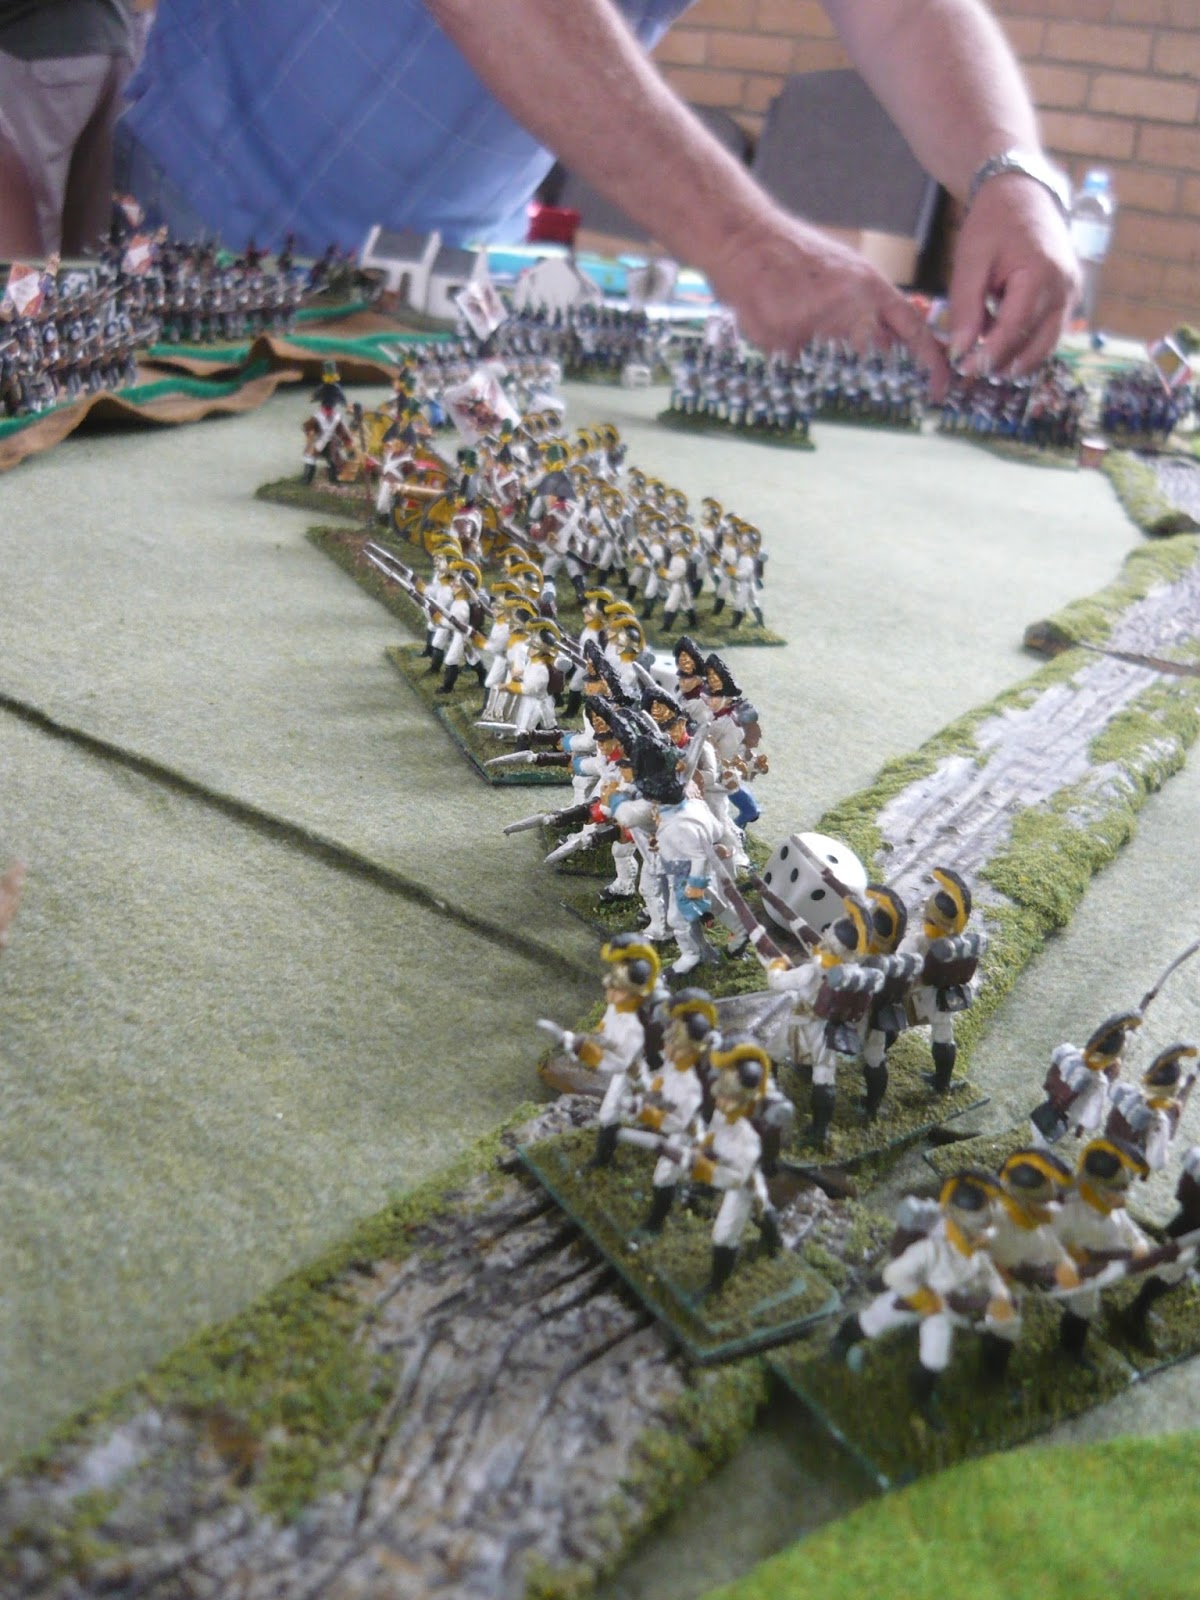
| 1st Column negotiates the bottle-neck in front of Rothenburg... |
 |
| ...with the best troops to the fore; the Smolensk and Little Russia Grenadiers. Behind the guns are the dragoons, ready to do or die! |
 |
| The 4e Legere await developments |
I tried charging the French line with my small dragoon compliment, but suffered the consequences of charging in column against a line of steady, well-trained troops. Out of the 5 figures that went in, only 2 came back, plus their attached general, who managed to rally them in the next couple of turns. Oh well, back to the drawing board!
 |
| The dragoons rout after the disastrous charge, the general attempting to rally the survivors. If I'd rolled slightly better, it wouldn't have ended in tears, but probably wouldn't have succeeded anyway! |
 |
| Plan B: advance the infantry on both flanks, leave a gap for the artillery and hussars to advance in the middle. |
By this stage, 2nd Column began to debouch from the defile to the left-rear of the French line at Rothenhof. This consisted of 3 more infantry regiments plus two of jaegers (*sigh*) and a half-battery of artillery. At the same time, Quinny's Austrians started appearing from the next valley, led by one of his cuirassier regiments. This pleased me greatly, as they caught the attention of Andrew's dragoons who had looked likely to make a move on my 2nd Column which would have forced a stop to any advance into the French rear. As it was, the remaining French infantry deployed in line, bottling the 2nd Column up in the mouth of the valley (all hills were steep, which means 1/2 speed and 2 disorders).
 |
| 3rd Column approaches! Rothenburg is in the distance with the French in between them and the 1st Column. |
 |
| 3rd Column deploys in the mouth of the defile. The right hand battalion fans out on to the 'steep' slope (just use your imagination, OK?), incurring disorders and reduced movement. |
 |
| The half-battery of foot artillery in the lead of 3rd Column have their work cut out for them! |
 |
Back in front of Rothenburg, the infantry squeeze into the gap between the Danube and the hills, still leaving a space for the guns and cavalry. It took me a while to realise I should get my guns a lot closer to guarantee greater damage to the enemy line. D'Oh!
|
Quinny's Austrians put pressure on the French centre, where Glenn and Tim occupied the vineyards between Ober- and Unterloiben. Their plan was to resist the Austrians in a defensive position and await the arrival of Dupont's division. They had sent off a messenger in the first turn, so they just had to wait for the message to be delivered and the reinforcements to arrive. This would take several turns in which Quinny managed to chase off the supporting French artillery battery and then winkle the infantry out of their defensive position. With their backs to the Danube, though, they had to be praying that Dupont would arrive sooner rather than later! Andrew commanded the infantry between Rothendorf and Unterloiben which were in the open without the luxury of a defensive position, so in typical fashion went on the offensive. These troops weren't cut from the same cloth as the light infantry in Rothendorf, though, and his attack stalled when his troops failed their pre-melee morale check. However, one of his battalions in square managed to give the advancing cuirassiers a volley into their flank, forcing the cavalry to retreat and buying some time.
 |
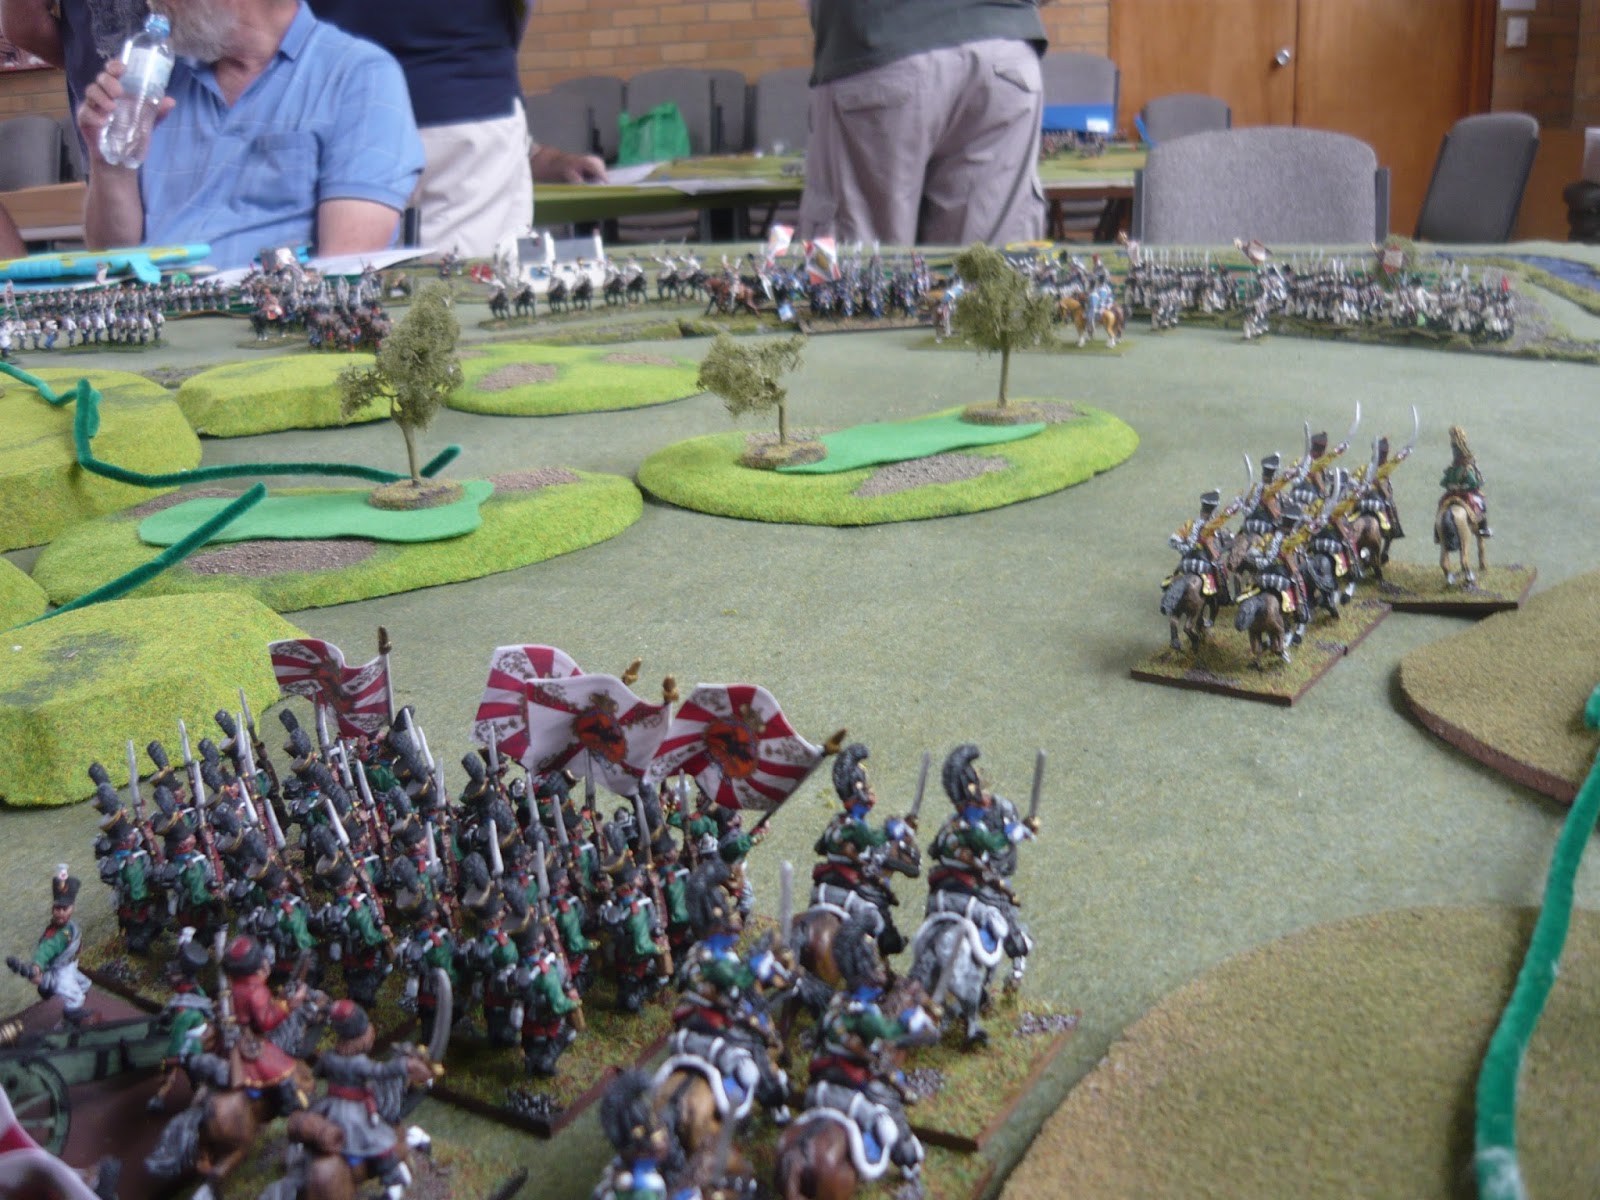
| Quinny's Austrians erupt from the central defile. His cuirassiers are making a bee-line for Glenn's artillery on the flank of the vineyards. |
 |
| Quinny advances on the vineyards under the cover of the cuirassiers. |
My 2nd Column next tried to escape the bottle-neck in a move that Andrew confessed he didn't see coming. My centre battalion was deployed in line over the mouth of the defile with a battalion either side. The right hand column was deployed in line over the steep hills countering the French deployment to their front and suffered the movement and disorder penalties accordingly. On the left, the battalion was still in column, so I marched it up to the flank of the central line, pivoted on the right and deployed into line, but suffering the maximum disorders due the terrain. This move allowed the left of my line to overlap the flank of Andrew's line, but I ran out of actions to be able to fire that turn. That left Andrew to decide whether to extricate himself from his predicament and incur the opportunity fire this round, or wait for my turn and suffer flank fire later. In the end he took the active choice and pulled back, copping my flank fire. Because of the multiple disorders, my accuracy was woeful and missed completely, but I still forced the morale check which he failed. However, it was only a retreat from which he quickly recovered. I didn't follow up to exploit my success as the victorious line was completely disordered and I didn't trust the jaegers to do anything but run. Still, it allowed me some breathing space.
 |
| The left hand column of 3rd Column, fans out into line into the flank of the French line, but picking up maximum disorders on the way after manoeuvring over the steep terrain. |
 |
| Surprise! The ensuing flank fire and failed morale test forced the French line to retreat. |
 |
| The French recovered in a better position than they left. Maximum disorders left me reluctant to follow up, but I could have sent one of the other battalions to chase. Another example of conservative mindset! |
 |
AwOOOgah! AwOOgah! Alarm! Alarm!
French reinforcements enter the battlefield! |
 |
| The French battery scoots for cover under threat of Austrian cavalry, while the Austrian infantry bear down on their counterparts in the vineyards. |
 |
| In between the vineyards and Rothenburg, the Austrians meet stiff resistance. |
 |
| The French dragoons face off against the approaching enemy cavalry threat... |
 |
| ...but the French infantry square put paid to the threat for the moment, with a blast of flank fire. |
The best chance to break through was still my combined arms force in front of Rothendorf. After my initial cavalry charge ended in failure, I thought I'd be a little more systematic. I moved my artillery up over the last turn, so that the range was shortened and I'd be guaranteed of causing casualties. I also moved up my grenadiers up and formed them into line, allowing Andrew to have two free shots in the process. It was a costly maneuver, but achieved what I set out to do; that is protect my cavalry charge from the full brunt of the French line's firepower. Accordingly, I sent the hussars in and in the ensuing melee won a Pyrrhic victory, which in our rules means that the loser is forced to retire and the victor only gets to occupy the ground recently vacated, rather than get a breakthrough move. Still, a win's a win! The French line was broken. Now to exploit the gap and force a way through.
 |
The Russian hussars burst forth from behind the artillery to dislodge the infantry from in front of Rothenburg. 1st Column lick their lips in anticipation!
|
 |
The other French line falls back to conform to the other line's backward move. The hussars pay for their success by taking casualties from close range infantry fire, then breaking to the rear after failing the resulting morale check.
|
First step in that process was to occupy the part of the village closest to the river. In doing that I had a nice flank shot into the line I had just displaced. This time, they couldn't resist and miserably failed their morale test, breaking and fleeing to the rear! The other French line withdrew behind Rothendorf before they suffered the same fate as I massed the remaining battalions to knock through the line and get into the flank of the French facing my 3rd Column. I wasn't confident that the available forces were sufficient to break the line facing me, despite the fact their partner battalion had just bugged out. I sent the infantry who had successfully seen off the first French line into the next built up area adjacent to the remaining French line, suffering another casualty, but gaining my objective.
 |
Time to get things moving!
One of the Little Russia grenadier battalions occupies part of the village on the French falnk |
 |
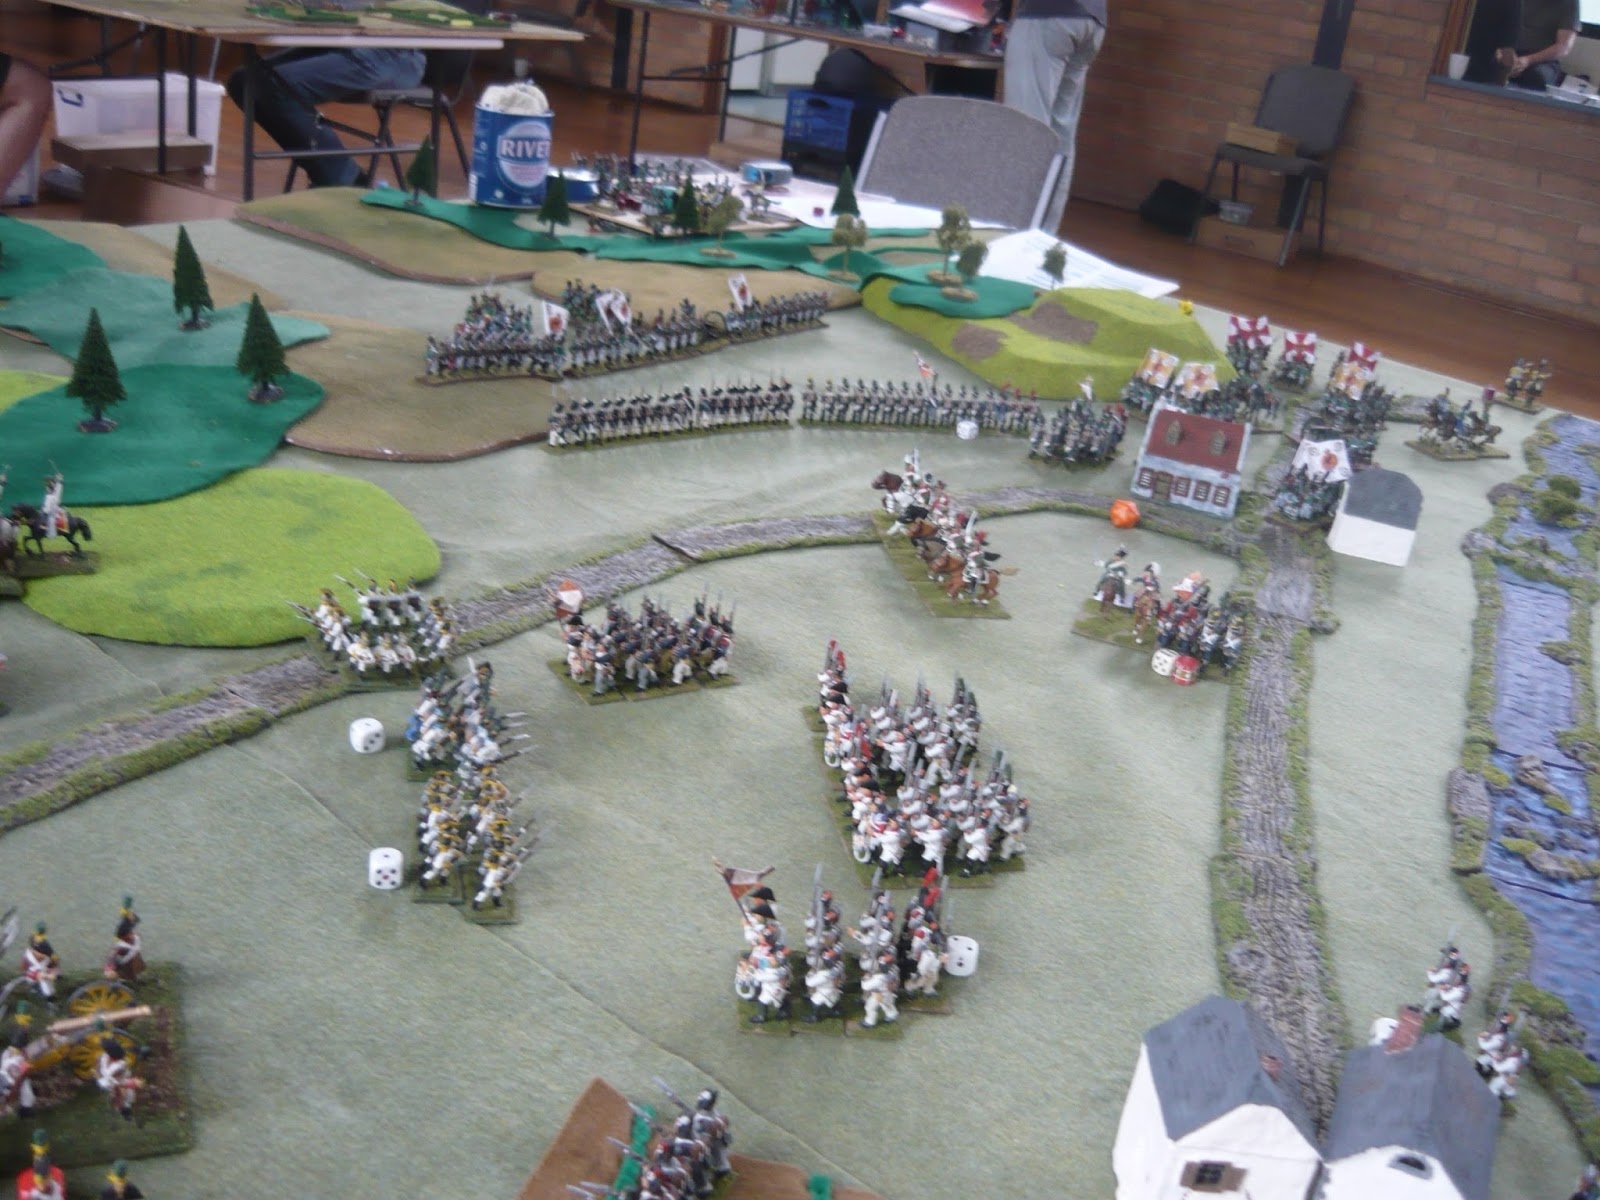
| 3rd Column await developments in front of Rotherburg, to the left of picture, while the Austrians battle it out in the centre. |
 |
| The French reinforcements snake along the road, approaching Quinny's right flank! |
 |
| Time to act, says Andrew. After seeing off the cuirassiers, he launches an infantry attack, which is met in a counter-charge by Quinny's Austrians |
 |
| Andrew's dragoons advance to threaten the enemy infantry |
 |
| The combat results in an inconclusive draw! |
 |
| Quinny is forced to break off some of his infantry from the vineyard attack to deal with the approaching French deluge! |
 |
| BANG! The flank fire from the built up area causes the French line to panic and break! |
 |
| Time to pile on the pressure. Andrew pulls back to conform with the troops facing 3rd Column. 1st Column's infantry angle towards the French flank, while the artillery lends a hand. The battalion which saw off the French line exits one BUA in preparation to move into the next one. |
 |
| The fleeing French are rallied by the general, however, and will make a return visit |
 |
| Darren's 2nd Column appear in the nick of time, aimed straight at the left-rear of Tim's French who were just beginning to engage Quinny's Austrians. |
 |
| "Enemy straight ahead, Sir!" |
 |
| The head of Tim's French column contact the Austrians... |
 |
| ...while the middle of the column see a nasty surprise over their left shoulders. |
 |
| Glenn manges to re-man the artillery battery in the rear of Quinny's cuirassiers. Quinny's landwehr reserves get thrown into the defense of the flank, while the battle rages further up the table. |
 |
| The view form behind Rothenburg: Quinny's infantry look hard-pressed as Andrew attempts to break the Austrian resistance before my attack breaks through behind them. |
Andrew then fell back further, linking up both the line facing Rothenburg with the troops facing the 3rd Column. I got the artillery through Rothenburg and set it up with a flank shot into the French line, but also so that it could bear on the battalion which had broken but since been rallied and was now making its way back into the fray. Before that could happen, though, my guns had fired and the line broke, leaving a gap open for my small dragoon remnant to charge into the right-rear of the line facing 3rd Column. It copped flank fire from the rallied battalion (which I had not counted on!), so its charge was scuppered, but the remaining infantry around Rothenburg then had the opportunity to deal the final blow to French in that sector.
 |
| Andrew contracts his line further, backing off from Rothenburg in column |
 |
| Quinny launches a now-or-never attack on the vineyard, as the French reinforcements approach. |
 |
| Glenn counter-charges through the vineyard. Maybe not the best choice? |
 |
| Glenn's troops break to the Danube, while the Austrian infantry occupy the vineyard at the top right of the picture. |
 |
| Back in Rothenburg, the Russian infantry mass in preparation for an attack on the French. The artillery move through the village, while the dragoons move between the Danube and the village. The closest BUA is occupied by the Little Russia grenadiers in an attempt to counter the French line masking the village. |
 |
| The dragoons sneak around the village towards the open flank of the French line. |
 |
| The Russians close in while the French consolidate. |
 |
| "атаковать!" |
 |
| "продвигать!" |
 |
| The French defensive line stabilises behind Rothenburg, while the rallied infantry battalion approaches to the right flank |
 |
| Tim's French reinforcements engage Quinny's troops, resulting in the routing of the landwehr! |
 |
| Darren's infantry advances to the rescue. |
 |
| As do his cavalry. |
 |
| Tim's rearguard turn to face the threat... |
 |
| ....while his vanguard pushes on! |
 |
| Back in the centre, the Austrians stand their ground... |
 |
| ...against determined French pressure. |
 |
| Tim's cavalry launch a long range flank charge against the Austrian infantry which had gained the vineyard. Here, the head of the cavalry column contact the infantry. |
 |
| More Austrians head to the rear! |
 |
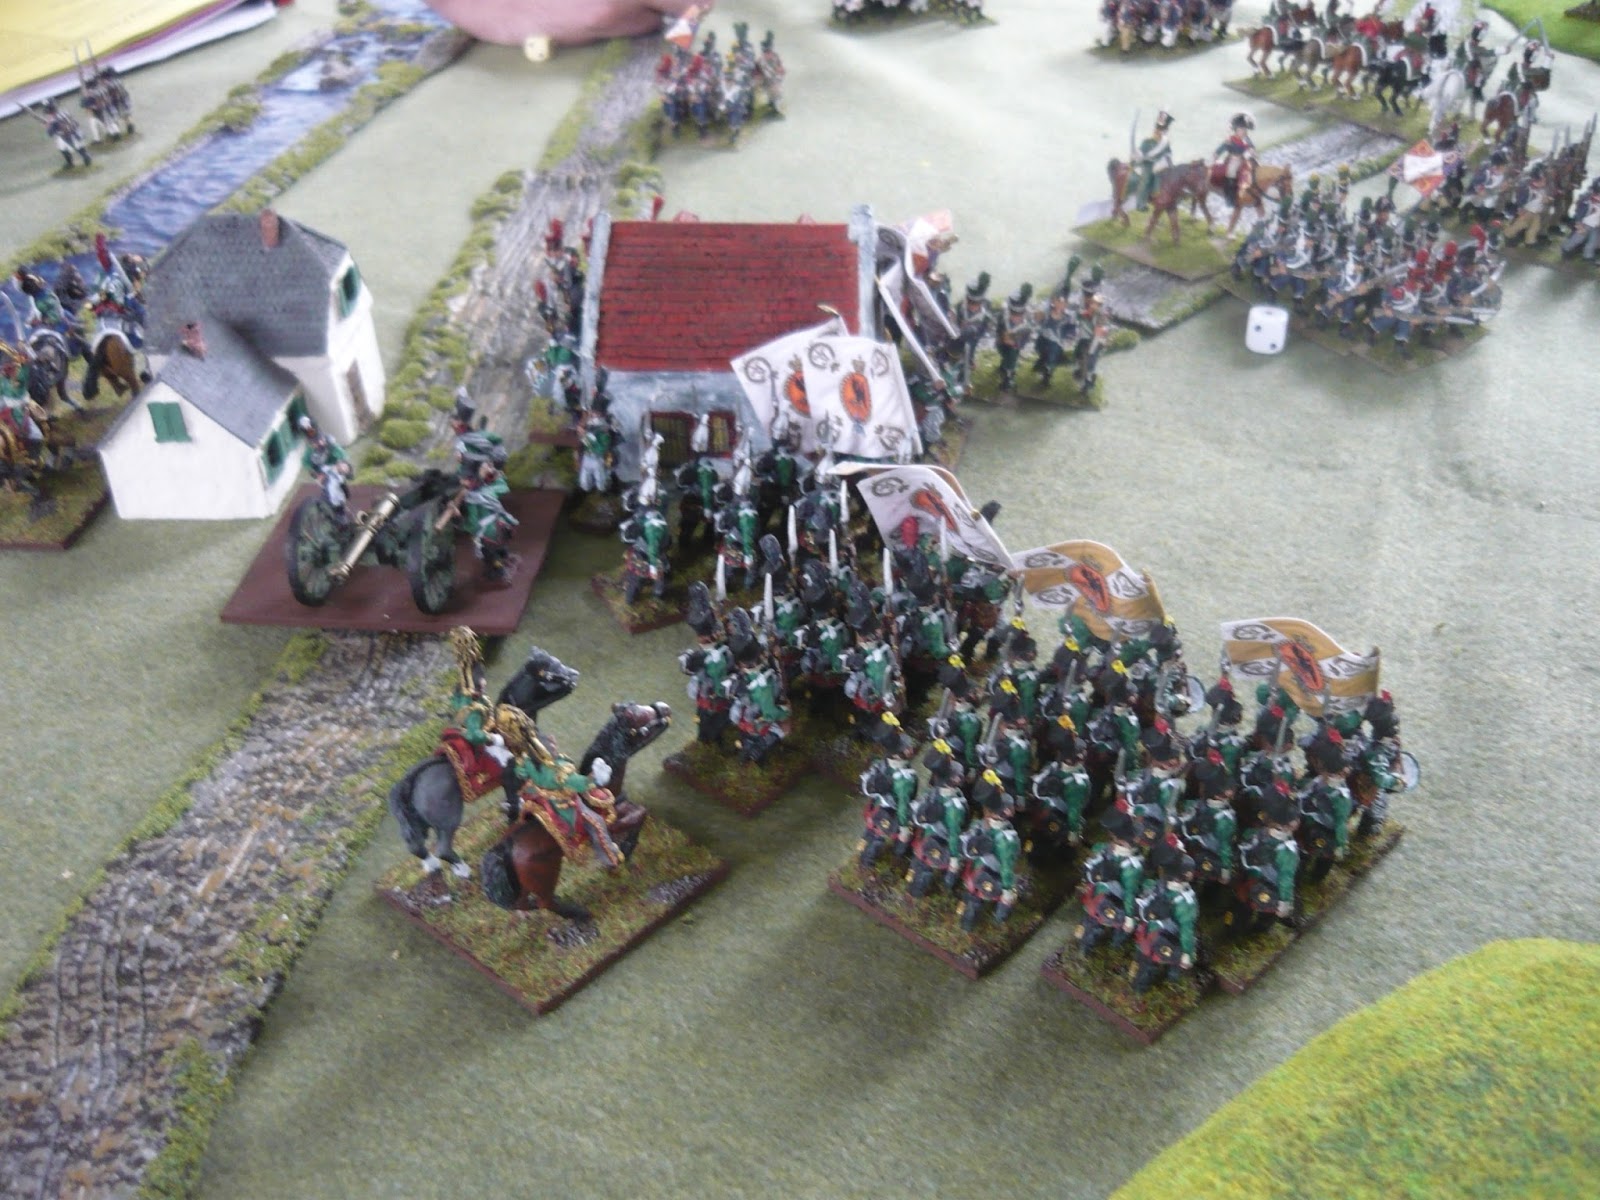
| Behind Rothenburg, the Russian artillery position themselves for a flank shot on the line, while the cavalry protect them form the advancing column. |
 |
| The artillery fires down the flank of the French line. Unable to stand the pressure, the line breaks and flees to the rear, opening up the flank of the rest of the line. Huzzah! |
 |
| Waiting for the right moment, the rest of 3rd Column mass |
 |
| Italian cavalry reinforcements appear. Too late? |
 |
| Austrian cuirassiers charge Tim's infantry in an attempt to stop the rot. |
 |
| Another inconclusive charge from the French in between Rothenburg and the vineyards. |
 |
| The Russian dragoons try a death or glory charge on the flank of the French line |
 |
| The closed column at the top left stymied the cavalry attack with a volley of flank fire as it passed , so it's up to the infantry! the charge goes in, spelling doom for the French defense! |
Even though the French had reinforcements arriving in the shape of Italian cavalry, it was too late. My success to the east and Quinny's tenacity in the centre in the face of determined defence by Glenn and a spirited attack from Tim, coupled with Darren's eventual arrival to bottle the French in, proved too much for the French to overcome. It was declared an Allied victory! Huzzah!
*Jim prompted the game by requesting an to practice playing a Russian force. Guess who couldn't make it to the game, though? ;-)